Showing posts with label crafts. Show all posts

Friday, April 14, 2017

How you can make a toy boat that really floats

These toy boats really float, and would be perfect for a preschool unit, or high school science experiments in buoyancy.

The other day I wanted a couple of quick, cheap toy boats that would float. We were headed out out to our favorite puddle. Both of my little ones LOVE stomping back and forth through the puddle, and I love that their naps usually happen in a timely manner afterward.  However, our last puddle day had ended with swimming, and it's still a little chilly for that, even here in Alabama. So,to encourage wading in the puddle, I made a quick toy.


These easy to make bottle boats are the perfect toy for Earth day, my preschoolers loved them


When we lived in an apartment and weren't fortunate to own our own puddle, I'd put my children in their bathing suits, and let them play in the bath on rainy days. These boats would work great there too!

Saturday, July 2, 2016

How to set up a patriotic craft for your toddler


"Mom, she's messing up my project!" I love having children of several different ages, but hearing this phrase is one of the hazards. So, when I put together the patriotic math craft for my six-year-old together the other day, I decided to put together a toddler July project for my two-year-old as well. The toddler of the patriotic craft offers great fine motor practice, and you can always get familiar with some shapes, colors and counting along the way.


Wednesday, April 27, 2016

How to Protect Migrating Birds from Flying into Your Windows

On a lovely day in late spring, moms were chatting, and children playing when "THUD". The sickening sound of a bird hitting a window sounded through our home. The children rushed outside to help the poor creature, while the moms called to them not to touch the poor creature.


Birds can be harmed year when they fly into your windows.  This fun craft is an economical, and effective solution.


Tuesday, March 8, 2016

Why is there More Wind in the Spring and Fall? and 10 Amazing Do ItYourself Wind Chimes

Why is there more wind in the spring  and fall than at other times of year? And, 10 cool wind chimes you can make to take advantage of that wind.


The neighborhood sirens scream. I grab the baby and call my kids into the hallway, checking my phone to figure out just how far away the tornado is. Tornados come when winds pick up in the spring and fall. The wind can be scary, but most days we enjoy the breeze. It's a great time to build a wind chime, and I have ten amazing wind chime ideas for you. Why is it extra windy during spring and autumn?

What's so special about spring and autumn?


To understand why the winds pick up in spring and fall, think about what else is happening. In the spring, the suns rays are becoming more direct, and beginning with the Equinox, are hitting the earth for more of the day than not.

The result of this direct radiation from the sun is that the air near the surface begins to warm. You may have heard the phrase "heat rises." That isn't true, but warm air rises.

As the air particles heat up, they expand to a greater volume for the same mass. This is called lower density. You could say that the warm air weighs less. It begins to float for the same reason boats float. As the warm air rises, cool air flows in to replace it, and the result is known as wind.


In the fall, the whole system works in reverse, with warm air being forced out of the way. 

Exactly how the wind will blow can't be exactly predicted. They follow a pattern best described by Chaos Theory.

Why is there more wind in the spring  and fall than at other times of year? And, 10 cool wind chimes you can make to take advantage of that wind.


I have some amazing Do IT Yourself wind chimes to help you take advantage of the breezes.


Do it Yourself Windchimes


Why is there more wind in the spring  and fall than at other times of year? And, 10 cool wind chimes you can make to take advantage of that wind.

Clock wise 
Clothespin Windchimes from B-Inspired Mama
Pony Bead Windchimes from Where Imagination Grows
Key Wndchimes from Inner Child Fun
Nature Windchimes from Hands on as We Grow

More great wind chimes  Rainbow Windchimes from sticks from Happy Hooligans
Coffee can Windchimes also from Happy Hooligans
Cutlery Windchimes from Red Ted Art
Bamboo Windchimes from Michelle Made Me
Recycled Windchimes from Maker Mama Craft Blog (This one is really simple!)
Out door Music Windchimes from Hands on as We Grow

Wishing you a gentle change of seasons, with no tornadoes and winds just right for a lovely wind chime.


You may also be interested in

A Simple Introduction to Chaos Theory

A Weather Demo you can do while making dinner
Easy Windsock to make with Kids
Why boats float + 10 boats to make

Friday, February 5, 2016

Beautiful Multiplication Pine Cone Craft

Multiplication practice from a nature art approach. Use pine cones to make math fun.

At 1:00 pm, a young student stares out the window, oblivious to the math lesson: at 4:00 pm, that same student stares at a pine cone she found on the walk home. Her eyes follow every crevice, and as her fingers trace the rough sticky surface, as she breaths it's fresh aroma.

Here is a fun way to work on your multiplication skills and make some beautiful nature art at the same time.


Thursday, January 14, 2016

Lovely Valentine Experiment for Kindergarten

This is simple science experiment that will dress up your Valentine cards.

Here's some lovely process art for you to try. Perfect for making those kindergarten Valentines even prettier!

My kindergartner and I had the best time experimenting with these home made Valentines. We made some beautiful designs, and got just a little messy. This would be a great way to spend time with your favorite kids.


Wednesday, December 23, 2015

Christmas Ornament Subtraction Craft

These DIY ornaments turn out so pretty that children might like to do them at home for fun or as gifts. However, you could easily use them for subtraction practice. They even satisfy the algebraic component called for in Common Core. Who says you can't have Christmas fun and do math at the same time?

Great kindergarten craft for practicing subtraction! It reinforces algebraic thinking, and would be great at Christmas or any time.

Thursday, December 17, 2015

Bead Snowflake Addition and Subtraction Practice

The dishes were piled high, creating a mess that matched the rest of the house, and I needed to eat the lunch I had missed with the rest of the family, but some how I found myself offering to pull out the math craft I'd been promising my daughter.

I explained that we needed to make four snowflakes, and her eyes lit up. "You make two and I'll make two." So we did.

Beaded Snowflake Addition and subtraction practice


Tuesday, December 8, 2015

Super Fun Holiday Party Activity Cheat Sheet

Super Fun Holiday Party Activity Cheat Sheet


"Would you make me a paper airplane?" Lunch time was just ending, and I didn't even have paper available when my son's  classmate asked this question.  I thought it was just a random request. Then the next time I visited the school, another child asked for one, and another, and another.  In fact, they were still asking months later when I went in to have them write end-of-the-year thank-you notes to their teacher.  Finally, I realized why they were asking.

Thursday, November 19, 2015

Adding Doubles Christmas Tree Math Puzzle for Kindergarten


Adding Doubles Christmas Tree Math Puzzle for Kindergarten


As my first fall in the classroom drew to a close, it dawned on me that I wasn't going to make it through my curriculum.  With mandated exit tests looming (as in, fail the test, and you don't graduate), I knew I needed to at least get the planned content in front of my students.  I also knew that they expected to have a party the last day before Christmas break. In a move of desperation, I wrote an entire unit's worth of material into a Christmas theme and taught the whole thing the last day before break.  They moaned and groaned, but most of them decided to play along, and when we reviewed months later they remembered our reindeer games!


Friday, April 24, 2015

Kid made nesting supply station

Caring for the wild creatures in our own neighborhood is my favorite way to teach my children to respect the environment.  The Pony Artist wanted to welcome the Robins.  I did a little research, and discovered that birds may appreciate nesting supplies.   Here's how she made her own nesting supply station.

Welcome the birds back to your neighborhood with this easy project!


If you would like to make a nesting supply station, here's what you need:


Two strips of felt
Thread
Needle scissors
Yarn (Be sure to use cotton, not synthentic, for the safety of the birds.)


First, the Pony Artist chose two strips of felt from our left over stash.

Welcome the birds back to your neighborhood with this easy project!


Next, she sewed the ends together.  This was the most challenging part.


Now it was time to prepare the actual supplies.  She chose some yarn and some string she thought the birds would like and snipped it into pieces.

Welcome the birds back to your neighborhood with this easy project!


She put it in the holder, and we tied it to a tree branch.  

Welcome the birds back to your neighborhood with this easy project!

It was emptied quickly and my husband thought it looked like the birds were trying to take the holder too!

This was a fun project that gave us a great opportunity to discuss the specific needs of the birds living in our neighborhood.  Of course, we got some fine motor work in as well.   If you have some extra felt and yarn on hand, why not welcome the birds by providing some nice soft lining for their nests?


Several bloggers have been working on using up our craft stash by making up learning activities with things we have on hand.  You can check out the other Learn with your craft stash projects here.


Be the first to know about new curriculum from Thriving STEM and receive an organized list of new and seasonal ideas for enjoying science and math with your children by signing up for the Thriving STEM newsletter.


You may also like these posts:


Saturday, March 28, 2015

How to make your own constellations

We love looking at the night sky.  If your child is interested in space, or you would like them to be, here is a fun project that brings the heavenly bodies a little closer home. It was also a good way to sneak in some fine motor practice.

Bring the heavens a little closer earth with this fun upcycle project about constellations.

Materials:

A polystyrene (styrofoam) tray--Ours come with squash.
Tooth picks
Pictures of the constellations in your night sky


Bring the heavens a little closer earth with this fun upcycle project about constellations.

To get our constellation pictures, I used the Star Chart app on my phone.  Have you sen this?  You can just point your phone at the sky and it fills in the pictures the constellations represent.  Snap a screen shot, and you have a picture of the exact constellation you are studying.

If you don't have access to Star Chart, you can do a quick image search, and come up with a printable picture. (If you are using this in a group setting check the copy rights.)

Then just print out the photo, and lay it it over the tray.

Bring the heavens a little closer earth with this fun upcycle project about constellations.

Use a tooth pick to punch out the designs. 

Bring the heavens a little closer earth with this fun upcycle project about constellations.

After doing a few real constellations, my kids decided to "make up" some constellations of their own.

Bring the heavens a little closer earth with this fun upcycle project about constellations.

Holding the trays against the window gives the effect of stars shining in the night sky.

Bring the heavens a little closer earth with this fun upcycle project about constellations.

Bring the heavens a little closer earth with this fun upcycle project about constellations.

This post is part of the 60 Day Junk Play Challenge.  Be sure to check out the other great activities being done with items from the junk pile, and try a few with your own kids!


Other posts you may like:


Friday, February 6, 2015

Easy Kids Toy Valentine

Make a simple toy Valentine with or for your kids.


Here's a simple do it your self Valentine that doubles as a toy

I used to spend hours in my mom's bedroom playing with two tiny toy dogs that she kept in her dresser. The dogs were Christmas presents from her brother on a year when there hadn't been much in her own girl hood. The toy dogs used to mysteriously float toward each other, joining with a "clink!" They would pull each outer around from opposite sides of a piece of paper. They were amazing!


Friday, January 9, 2015

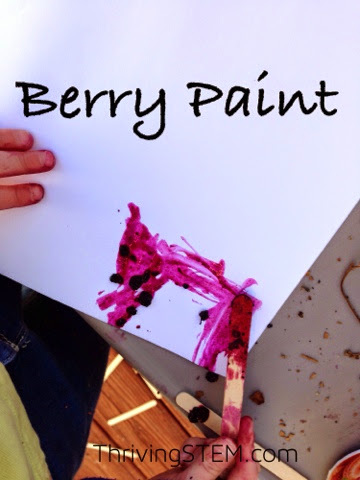
How to Paint with Berries

Don't you love art projects that use natural materials and produce a beautiful result?  Nature based art projects are a wonderful opportunity for kids to learn about  nature, practice the scientific method, and do some engineering all at the same time. Sometimes this is called STEAM, adding art to STEM. To be honest, my kids had to beg for this activity.  I was really nervous about the mess.  It was not that bad, though, especially since we worked in the back yard.

My kids loved this natural art project!! The science and engineering play are built in, for a great STEAM learning experience.

The berries we used were wild elderberries that had been growing in our backyard.  It turns out that elderberries can be used for medicine.  We decided to use ours for paint instead.  

CAUTION: If you think there is a possibility that your little artists will want to eat the paint, stick with a food edible berry like blue berries.  For our purposes, I just kept the littlest one occupied elsewhere.  Like many types of paint, ingesting this substance would be dangerous!  


My kids loved this natural art project!! The science and engineering play are built in, for a great STEAM learning experience.

Materials you will need for Painting with Berries

Berries
White paper
Sticks, pine needles or paint brushes
Plastic dish
Water
Baby wipes for clean up

The kids started by gathering some berries from this vine.  If you do not have wild berries in your yard, it would be worth purchasing a package for the sake of art and science.


My kids loved this natural art project!! The science and engineering play are built in, for a great STEAM learning experience.


This berry juice does not come off of hands easily with soap and water, but baby wipes took it off of everything!  

My kids loved this natural art project!! The science and engineering play are built in, for a great STEAM learning experience.

Once the berries were gathered, they used the stick to mash the berries. 

My kids loved this natural art project!! The science and engineering play are built in, for a great STEAM learning experience.

 They then added a little water, and more berries, and then mashed some more.  

My kids loved this natural art project!! The science and engineering play are built in, for a great STEAM learning experience.

Finally, it was time to paint!

My kids loved this natural art project!! The science and engineering play are built in, for a great STEAM learning experience.

My kids loved this natural art project!! The science and engineering play are built in, for a great STEAM learning experience.


The results were quite stunning.  The berry color was vibrant even after it had dried.  I think that we will be repeating this project.  I hope you will give it a try too!


If you enjoyed this post, consider signing up for the Thriving STEM newsletter to receive a summary of each month's activities with their corresponding objectives, and occasional coupon codes!

More Sensory Learning Ideas

Interested in a whole unit of  preschool senses learning ideas? Check out this unit that I coauthored with 11 other teacher/mom bloggers.  

Purchase 5 Sense Preschool Lesson Plans


Other posts you may enjoy:


Monday, December 29, 2014

New Year Party Challenge and How to Make a Binary Abacus

I hope you had a wonderful Christmas with your loved ones! Here is a New Year's coding challenge in case you would like to use it for your New Year's Eve Party.  You may want to put together an easy binary abacus to have on hand to help your guests solve the riddle.

Here is a fun challenge for your New Year Party guests or Middle School computer club!  You could even use it as an extension for elementary students studying place value.

New Year Coding Challenge

The challenge is simple: Write out the new year in Binary. Computers are going to be processing the new year in a number composed of just one's and zero's. Computers are composed of tiny circuits which are either on or off.  On circuits equal a "1."  Off circuits equal a "0".  Those two digits compose the most basic computer language called "Binary".   

Just like our normal ten digit system, the first number in binary is 1.  However, since binary only uses the digits "1" and "0", the second number is "10" with one in the second place, instead of "2".  

Sound confusing?  Don't worry.  Just put together this easy binary abacus and you will be able to explain how binary works so well that even your elementary student will understand. 

How to make a binary abacus

Materials for making a Binary Abacus:

Card board box (left over from Christmas?)
Sharp object to poke a hole.  I used a skewer.
String
Pony Beads
Marker to write on the box.
Index cards
Tape

To get started, poke holes to thread the string about an inch apart, along the top of the box.

Here is a fun challenge for your New Year Party guests or Middle School computer club!  You could even use it as an extension for elementary students studying place value.

Knot the string on the inside of the box so that it does not pull through to the front of the box.

Here is a fun challenge for your New Year Party guests or Middle School computer club!  You could even use it as an extension for elementary students studying place value.


Place one bead on the first string on the right, and knot the string so that it stays put. (I used green.)  On the second string from the right, place two beads.  Move to the left, placing twice as many beads on each successive string.


Here is a fun challenge for your New Year Party guests or Middle School computer club!  You could even use it as an extension for elementary students studying place value.

Once you have the strings attached with the beads threaded, use your marker to add zeroes under each string.  

At this point you have a binary abacus that would work well for explaining how the binary works. Unless you string more beads than I did, it will not quite calculate the new year, however.

Here is a fun challenge for your New Year Party guests or Middle School computer club!  You could even use it as an extension for elementary students studying place value.

My last string had sixty-four beads. That is about as many as most of us will be able to remember and count.

When I moved around the corner, I took a short cut, and wrote the number of beads the string should have on an index card and taped it to the string.  Now we are ready to calculate the New Year in Binary!

Here is a fun challenge for your New Year Party guests or Middle School computer club!  You could even use it as an extension for elementary students studying place value.

How to Use the Binary Abacus to Calculate the New Year


To figure out what "normal" number is represented by the abacus, count the number of beads showing.  In the picture below, there are three total beads showing, so this is the number "3".  The binary number is represented by ones in each place where a string is hanging down.  So, the binary number in the picture below is "11".

Here is a fun challenge for your New Year Party guests or Middle School computer club!  You could even use it as an extension for elementary students studying place value.

Unused strings should be placed inside the box.  Those place values are represented by "0".  My son was pretty interested in learning how to do a computer language.   It dawned on him that this was also a math exercise though too.  Adding up the number of beads was a good review for him, and the place value practice was a great warm up for math he will cover soon.

Here is a fun challenge for your New Year Party guests or Middle School computer club!  You could even use it as an extension for elementary students studying place value.

Can you figure out what number is represented in this picture?  How would you write it in binary?

Here is a fun challenge for your New Year Party guests or Middle School computer club!  You could even use it as an extension for elementary students studying place value.

That's right!  There are ten beads, so the "normal" number is 10.  By looking at which positions have strings hanging down, we can see that the binary number is 1010. Wherever a string is hanging down, we put a "1".  In the empty places we put a "0".  Just like normal math, you can ignore all the extra zeros on the left.

You can see that my daughter was busy figuring out her age in binary.  The number showing in the picture is seven, written as 111 in binary. Another fun challenge would be counting to twenty.

Here is a fun challenge for your New Year Party guests or Middle School computer club!  You could even use it as an extension for elementary students studying place value.


Which brings us back to our original challenge: write the new year in binary!

Here is a fun challenge for your New Year Party guests or Middle School computer club!  You could even use it as an extension for elementary students studying place value.

There are several ways you can attack this problem.  I recommend starting with the number 1024, and figuring out what combination of other numbers you need to add to it to come out with 2015.  Add 512, then 251.  Keep going until you know which strings are needed.  Nothing but simple addition and trial and error.


Happy New Year!


Other posts you may enjoy:

(Chaos Theory for Kids!)